About apertures
Opticsbuilder allows you to define custom 2D cross-sections, called apertures, as a list of U,V coordinates.
Since these U,V coordinates are in 2D, they will be rotated in 3D to be perpendicular to the beam direction at the element where they are used.
In the main sequence editor, you can refer to these custom apertures by their name.
When starting the application, all files in the library, i.e. the 'apertures' subfolder are loaded in the window. You can later open external files to add apertures to your current session, and even save them to the library with the Copy button, after loading.
Apertures can be described by three file formats:
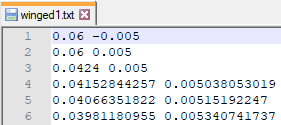
- TXT coordinate list (used in the aperture library): such a TXT file consists of N lines, and each line contains two U,V coordinates (in meters), expressing the 2D node position. The two numbers are separated by whitespace (at least one tab or space). Example:
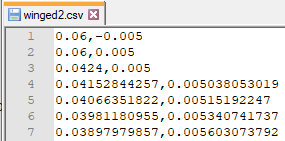
- CSV coordinate list: the same as a TXT list, but the coordinates of each line are separated by a comma, not whitespace. The advantage is that all spreadsheet editors can export in this format. Example:
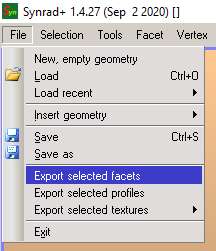
- Molflow TXT format: Both Molflow and Synrad can export in TXT format for backwards compatibility. That way you can export an existing facet of the geometry and use it as a cross-section in OpticsBuilder. Steps:
- Select the facet that you'd use as a cross-section. You can scale it to the desired size, but scaling can be done later in OpticsBuilder using parameters
- Make sure that the facet is in the XY plane (i.e. all of its Z coordinates are 0). You can use rotation, projection or the align command to achieve this.
Please note that in later versions this will not be required, OpticsBuilder will automatically determine the plane of the facet. However, note that the centerpoint determination is automatic (based on the U,V bounding box of the facet), so the result is not exact. If you project to the XY plane yourself, you'll have a deterministic result.

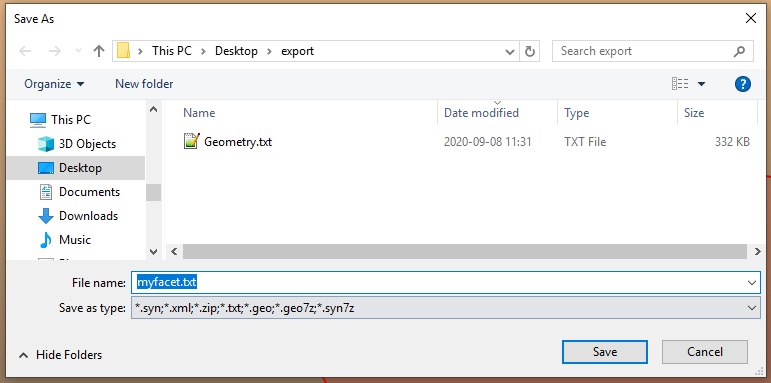
- Export the facet as TXT: File/Export selected facet(s), then manually give .txt as the file extension
- Now this exported TXT file can be opened by Molflow, Synrad and Opticsbuilder. Opticsbuilder will throw an error if the file contains more than 1 facet.
Adding new apertures to the current session

- Click on the last (empty) line in the list
- Give a unique name to the aperture: later you'll reference this aperture by its name. Names are case-sensitive, spaces are allowed. Don't use the built-in names (like circle, racetrack) as they will take precedence over user-defined ones.
- Choose the format of the file the aperture is exported in, from the combobox
- Use the Browse (...) button to choose the location
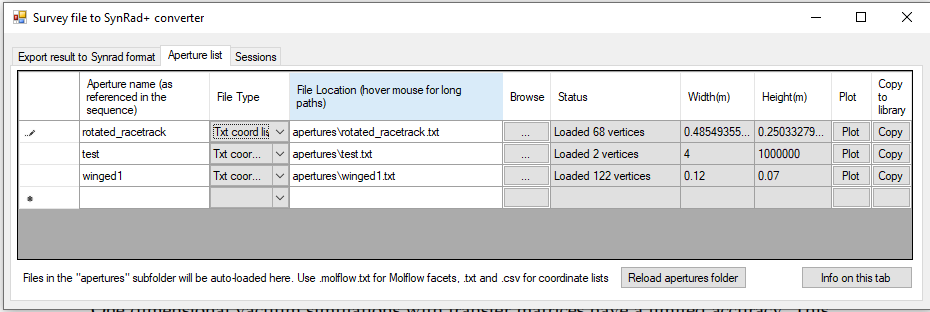
- After opening the file, if it was parsed succesfully, you will see its status:

You can see the number of vertices, the width and height in meters. - The Plot button opens a new window and visualizes the aperture:
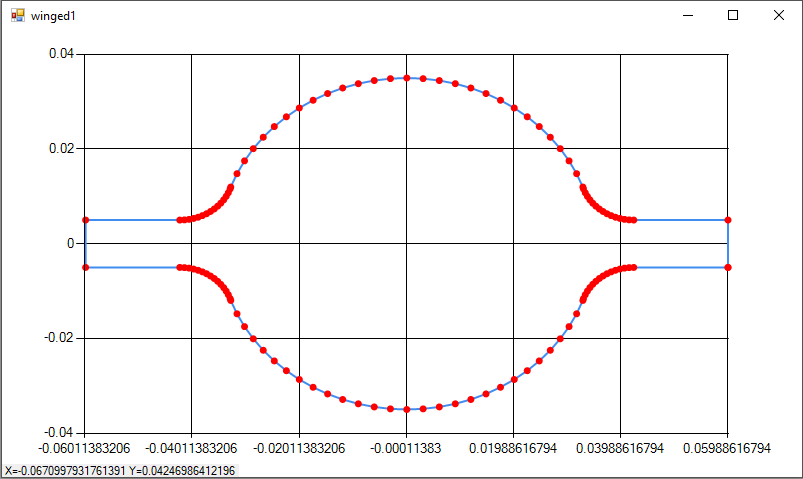
By hovering your mouse the actual coordinates are displayed in the bottom left.
Adding loaded aperture to the library
The Copy button is a helper function to copy the browsed file into the apertures library. That way it will be available on application load. If the file wasn't in simple TXT format (coordinate list), a conversion is made.
Using imported apertures
When editing the sequence, you can reference the custom apertures by their name, just like built-in types such as "circle":

If you don't set any parameters, the imported coordinates will be used "as is", relative to the origin (the beam reference).
Parameters are not required, but you can customize the imported aperture by four parameters:
- Aperture1: set the width of the bounding box of the imported aperture to this value.
The original, unscaled bounding box size is displayed in the aperture list's last two columns. That size will be used if Aperture1 and Aperture2 are not set. - Aperture2: set the height of the bounding box of the imported aperture to this value.
- Aperture3: offset the custom aperture by this X (horizontal) distance, in meters. (Example: writing ".5" will shift the centerpoint of the imported aperture from (0,0) to (.5,0). If empty, no X offset is applied.
- Aperture4: offset the custom aperture by this Y (vertical) distance. If empty, no Y offset is applied.
When using a combination of scaling and offset, scaling is executed first:
new_coord = ori_coord * scaling + offset